Stone Care Guides · 2026-07-15
How to Clean Coral Stone Without Damaging It in Miami
A practical Miami guide to cleaning coral stone safely, with clear advice on porosity, moisture, residue removal, biological growth, pressure control, and test areas.
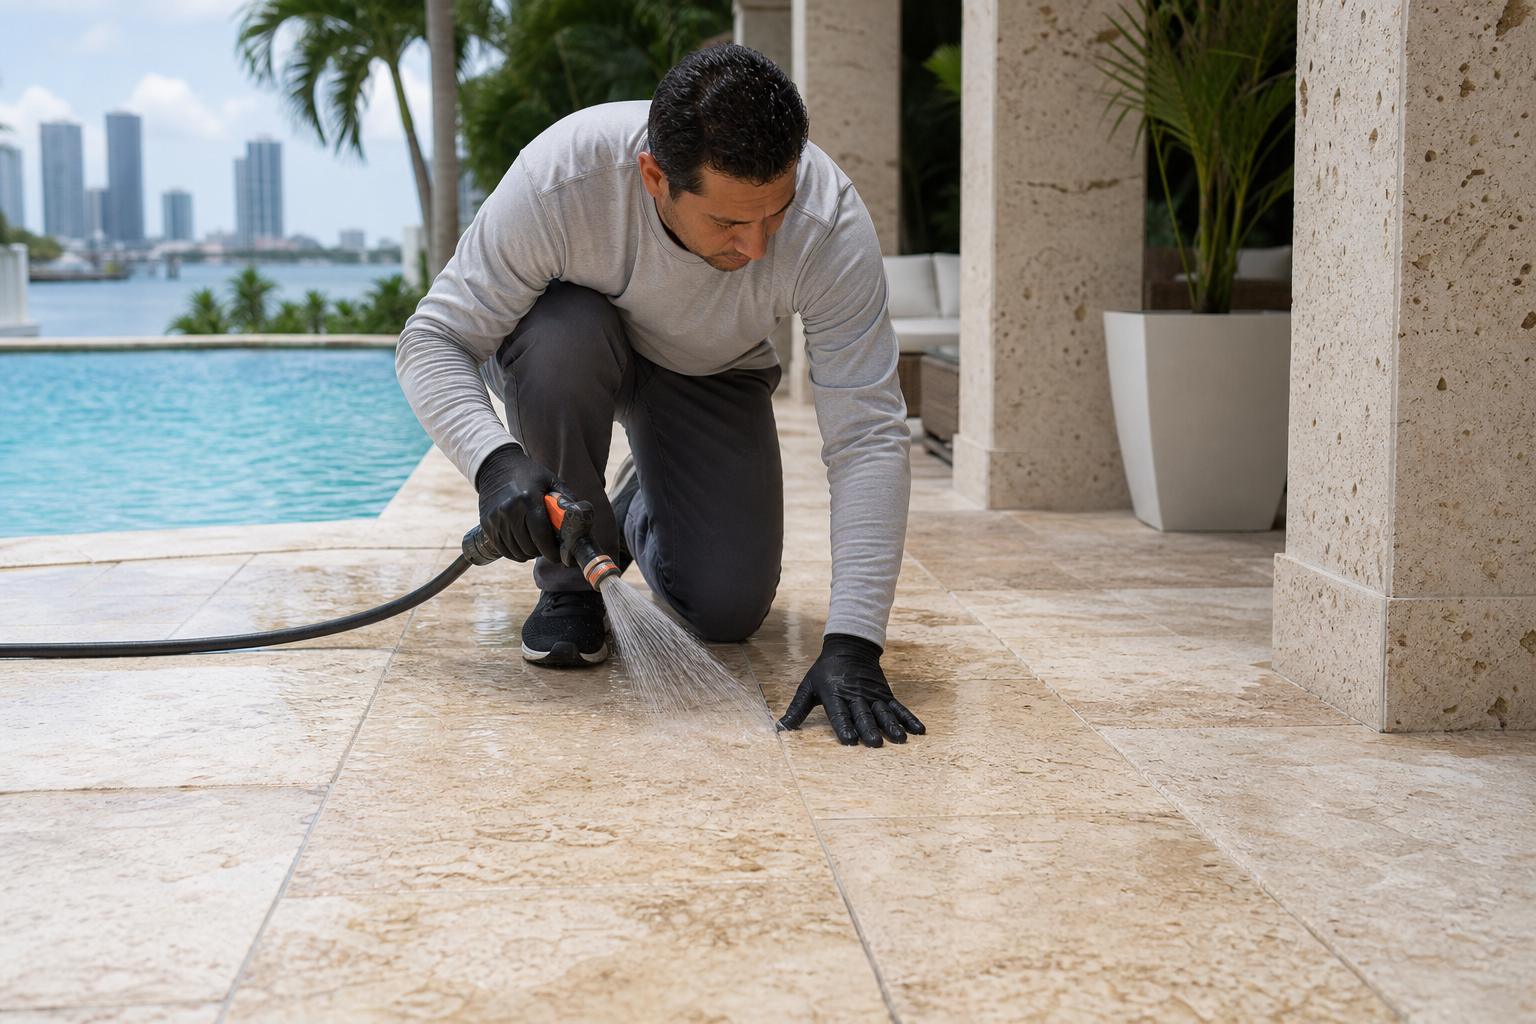
Coral stone is popular in Miami because it stays comfortable underfoot and suits pool decks, patios, walkways, and outdoor living spaces. It also needs careful cleaning. If you are trying to understand how to clean coral stone without damaging it, the key is knowing that this stone is naturally porous. Dirt, moisture, salts, organic staining, and cleaning residues can all settle into the surface rather than sitting only on top of it.
That porosity is why aggressive methods often create bigger problems. A process that looks fast on dense concrete or hard tile can roughen coral stone, open more pores, leave streaks, or drive moisture and contamination deeper into the material. In Miami, where humidity, rain, shade, irrigation, pool splash, salt air, and strong UV exposure all affect exterior surfaces, the right cleaning approach matters even more.
Why coral stone needs a different cleaning method
Coral stone has many tiny voids and channels. Those pores give it texture and character, but they also make it vulnerable to over-wetting, residue buildup, and surface erosion. Cleaning should remove contaminants while preserving the finish and allowing the stone to dry properly afterward.
On outdoor surfaces, common issues include:
- Biological growth such as algae, mildew, or dark organic film, especially in shaded or damp areas
- Moisture retention caused by poor drainage, frequent rain, irrigation overspray, or pool splash
- Salt and mineral deposits from coastal air, water evaporation, or hard water residue
- Embedded soil tracked in from landscaping and walkways
- Cleaning residue left behind by soaps or harsh chemicals that were not fully removed
Because coral stone is absorbent, the goal is not just to make it look cleaner for the moment. The goal is to clean it in a way that does not weaken the surface or leave behind conditions that cause rapid re-soiling.
Start with inspection, not pressure
Before any cleaning begins, the surface should be inspected. This is one of the most overlooked parts of safe stone care. The same patio can have dry sunny sections, damp shaded corners, splash zones near a pool, and low spots where water lingers after rain. Each condition affects how the stone responds to cleaning.
Look for:
- Powdering or fragile areas that may already be worn
- Darkened joints or edges where moisture remains trapped
- Green or black growth in shaded sections
- White deposits that suggest mineral or salt accumulation
- Previous coating or sealer residue
- Drainage patterns that keep part of the stone wet longer than the rest
This inspection helps determine how much moisture the stone can handle, what type of contamination is present, and whether the cleaning method needs to vary across the area.
Why a test area matters
A test area matters because coral stone does not always react uniformly. One section may clean up well, while another may reveal etching, residue, uneven color, or a raised texture after the same process. Testing a small, less noticeable section first allows the cleaner to check the result before treating the whole surface.
A proper test area can confirm:
- Whether the selected cleaner leaves the stone stable and natural-looking
- Whether the amount of water used is appropriate
- Whether the brushing and rinse process removes residue completely
- Whether the cleaning pressure is low enough to avoid surface damage
- Whether stains are organic, mineral-based, or a combination of both
Without a test area, it is easy to turn a manageable cleaning issue into a texture or color problem across the entire installation.
How to clean coral stone without damaging it
Safe cleaning usually follows a controlled sequence rather than a single harsh step. The best method depends on the condition of the stone, but the principles remain consistent.
- Dry remove loose debris. Sweep away grit, leaves, and soil first so they do not become abrasive when wet.
- Pre-check moisture conditions. If the area is already saturated from rain, irrigation, or pool splash, it may need time to dry before cleaning can be evaluated properly.
- Use a stone-appropriate cleaner when needed. The product and dwell time should match the type of contamination and should not leave harmful residue behind.
- Agitate gently. Soft to medium brushing helps lift debris from the pores without grinding down the surface.
- Rinse thoroughly. Residue removal is critical. Cleaner left in the pores can attract dirt, create blotchy drying, or interfere with future sealing.
- Use calibrated cleaning pressure only if necessary. Water pressure should be adjusted to the condition and finish of the stone, not treated as a one-size-fits-all fix.
- Allow adequate drying time. Drying reveals the true result and helps identify areas where moisture issues may still be present.
Porosity and moisture: the main reasons damage happens
When people think cleaning damage comes only from pressure, they miss another major issue: moisture management. Because coral stone absorbs water, over-saturating it can deepen staining, draw contaminants into the pores, and extend drying times. In Miami, humid air and frequent rain can slow evaporation, especially in shaded areas or where airflow is limited.
Moisture problems are often worse around:
- Planters and lawn edges with irrigation overspray
- Pool decks with frequent splash-out
- Downspouts or drainage paths
- Covered patios with less direct sun
- Walls or corners where airflow is poor
If cleaning does not account for those conditions, the surface may look better briefly but remain vulnerable to fast regrowth and recurring discoloration.
Biological growth needs removal, not just bleaching
Algae, mildew, and similar growth are common on coral stone where shade and moisture combine. They can make the surface look dirty and may also create slick areas. However, treating biological growth requires more than trying to whiten it quickly.
It is important not to assume chlorine is the universal answer. Harsh chemical treatment can create its own problems if it is too strong, poorly rinsed, or not suitable for the specific stone condition. The focus should be on loosening and removing the growth, then addressing the moisture source that helped it develop. Otherwise, discoloration and regrowth can return quickly.
In many cases, cleaning is only part of the solution. Drainage correction, irrigation adjustment, shade-related maintenance, and proper drying conditions all matter.
Why high pressure is not a universal solution
High pressure is one of the fastest ways to damage porous stone. Coral stone can lose its natural surface character if pressure is too aggressive or the nozzle is used too closely. The result may be pitting, roughness, uneven wear, or a patchy appearance where cleaner sections no longer match protected ones.
That is why calibrated cleaning pressure matters. The right pressure depends on:
- The age and condition of the coral stone
- Whether the surface is honed, textured, or weathered
- The severity of buildup
- The amount of moisture already in the stone
- The results observed in the test area
Some areas may need only low-pressure rinsing and gentle agitation. Others may tolerate a bit more force. The correct approach is measured and intentional, not based on the assumption that more pressure means better cleaning.
Residue removal is part of the cleaning, not an afterthought
One of the biggest reasons coral stone looks dull or gets dirty again too quickly is incomplete residue removal. If cleaning agents, loosened organic matter, salts, or soil remain in the pores, the surface may dry unevenly or develop a sticky, cloudy, or blotchy look.
Thorough rinsing and extraction are important because the stone does not shed residue as easily as denser materials. A clean-looking surface that still holds cleaner or dissolved contamination is not truly finished. In some cases, improper rinsing also affects how a future sealer bonds and performs.
Miami conditions that change the cleaning plan
Miami weather and site conditions influence coral stone care in practical ways. Humidity can slow drying. Rain can re-wet the surface before it has fully stabilized. Salt air may contribute to residue at exposed properties. Strong UV can dry sunny sections faster than shaded ones, creating uneven cleaning and drying behavior across the same deck or patio.
Other local factors matter too:
- Irrigation overspray can keep lower walls, steps, and deck edges damp
- Pool splash can leave mineral residue and maintain constant moisture near coping and walking paths
- Shade from landscaping or structures can encourage biological growth
- Drainage issues can hold dirty water in low spots after storms
Cleaning works best when these conditions are identified rather than ignored.
After cleaning: maintenance helps preserve the stone
Once coral stone is cleaned properly, ongoing maintenance should be simple and consistent. Sweep often enough to remove abrasive grit. Address leaves and organic debris before they break down into staining. Watch for recurring wet areas after rain or irrigation cycles. If the stone is due for sealing or resealing, the surface should be fully clean and properly dried first.
Maintenance is also about observation. If the same section keeps darkening, turning green, or collecting white residue, the underlying issue may be moisture or drainage rather than basic dirt. Solving that early helps reduce the need for more intensive restoration later.
FAQ
Can coral stone be pressure washed?
It can sometimes be cleaned with carefully calibrated pressure, but not with a one-setting approach. High pressure can damage the surface, so pressure must be matched to the stone condition and confirmed in a test area first.
What causes coral stone to turn dark or green?
Darkening or green discoloration is often related to moisture and biological growth. Shade, humidity, irrigation overspray, rain, and pool splash can all keep the stone damp enough for algae or similar growth to develop.
Why does coral stone still look dirty after cleaning?
If residue, dissolved soil, or mineral deposits remain in the pores, the stone may dry unevenly and still appear dull or blotchy. Complete residue removal and proper drying are essential parts of the process.
Why should cleaning start with a test area?
A test area shows how the stone reacts before the entire surface is treated. It helps confirm the right cleaner, moisture level, brushing method, rinse process, and safe pressure range.
Related stone care services
Get a condition-based recommendation
Send photos and a short description of the surface. We serve Miami and surrounding communities.
Request a Free Quote